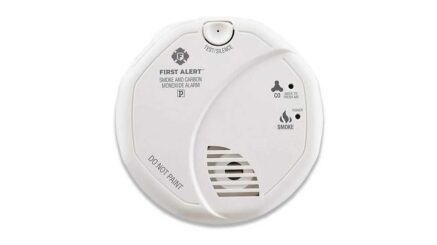
First Alert is the #1 brand in fire safety. The first line of defense that will help alert you and your family of a fire is a smoke detector. When purchasing a smoke detector, some factors to consider – are the type of detector, the location of installation, how many you need in your home, and the general maintenance of the alarm. How to install a First Alert smoke and carbon monoxide alarm? Follow these helpful tips to choose the right smoke alarm for your home and family and learn how to properly install a smoke detector.
Ideal numbers of smoke alarms to install
There are many different types of smoke alarms from which you can choose to install in your house. Different detectors have different features like 10-year sealed battery smoke alarms, combination smoke and carbon monoxide alarms, battery operated and hardwired alarms.
- Smoke Alarms: One on every level and in every bedroom.
- Carbon Monoxide (CO) Alarms: One on every level and in every bedroom.
- Fire Extinguishers: One on every level, one in the kitchen, and one in the garage.
How to install a First Alert smoke and carbon monoxide alarm
Step 1 : Choose the place
This detector is also equipped with voice alerts, letting you know the type and location of danger. First Alert also offers hardwire alarms and most come with convenient adapter plugs, so installation is easy and there is no need to rewire.
First Alert’s 10-year sealed battery alarm with voice and location technology offers hassle free protection and eliminates the need for battery replacements for the life of the alarm.
Step 2: Choose height
According to the National Fire Protection Association (NFPA), smoke detectors should be installed on every level of your home, in every bedroom, and outside every sleeping area.
When installing an alarm high on the wall, it should not be placed more than 12 inches from the ceiling. Also, avoid installing detectors near windows or air ducts, as this could hinder their performance.
To help avoid nuisance alarms, alarms should be installed at least 10 feet away from cooking appliances. Also, when installing your alarm, place the fire alarm on the ceiling or high on the wall because smoke rises.

Step 3: Install First Alert Smoke alarm mounting bracket
To install your detector, you will need a pencil, drill (with a 3/16” or 5mm drill bit), Phillips screwdriver, and a hammer. To begin installing, mark drill points on the ceiling no less than 8 inches from the nearest wall.
Next, drill holes, mount the alarm to the mounting bracket and twist the fire alarm into place. Screw on the base plate and insert any necessary batteries.
How to install a First Alert smoke and carbon monoxide alarm – battery powered?
In this guide, you’ll learn how to install a battery powered First Alert/BRK smoke, CO, or combination smoke and CO alarm.
Here are some things you’ll need:
- Tools :
- A drill, a pencil, a screwdiver, and a hammer.
- Alarm requirements:
- Do not install a battery-operated alarm over an electrical junction box.
- For best alarm performance and safety, pick an installation spot on your ceiling or wall at least at least 10 feet away from stoves and fuel burning appliances or humid areas like your bathroom. Also avoid direct sunlight or areas with too much air circulation, like near fans or vents. Learn more in our Alarm Placement Guidelines.
- Be sure to write the alarm installation and replacement dates on the back of the alarm.
Steps 1: Mount the alarm
First, you’ll mount the alarm.
- Mark the desired location for the mounting bracket with a pencil.
- Drill into each pencil mark that you made.
- Use a hammer to gently tap a plastic screw anchor into each hole.
- Insert the screws but tighten them only about halfway.
- Attach the mounting bracket to the screws and rotate the bracket into place.
- Secure the bracket in place by tightening the screws.
- Remove the battery pull-tab from the alarm.
- Position the base of the alarm onto the bracket and turn it clockwise until it’s secured.
| Optional security step: If needed, you can lock the alarm in place or lock the battery to prevent tampering. |
Step 2: Test the alarm
After installation is complete, you’ll test the alarm to make sure it’s running smoothly.
Here’s how to test:
- Standalone Alarms: Press and hold the Test/Silence button until the unit alarms. The test sequence will be very loud.
- Paired Wireless Interconnect Alarms: Press and hold the Test/Silence button until the first unit alarms. All interconnected alarms should sound. Repeat this process to test each alarm in the interconnected series.
How to install a First Alert smoke and carbon monoxide alarm – Hardwired?
In this guide, you’ll learn how to install a hardwired First Alert or BRK smoke, heat, or CO alarm.
Before you begin
Here are some things you’ll need before you start this process.
- Tools needed:
- Needle-nose pliers or utility knife, screwdriver, wire stripper, wire nuts, and a ladder
- Alarm requirements:
- A standard wiring junction box to a 4-inch (10 cm) size, on either the ceiling or wall.
- A 120V household electrical circuit (unswitched 120VAC)
- Proper alarm location and placement (See Alarm Placement Guidelines)
Step 1: Connect the alarm to 120V wiring
To begin, turn off power at the junction box and connect the alarm to the building’s electrical wiring.
1. Find the home’s junction box and turn off power.
2. Remove the power connector from the new alarm’s packaging.
3. Using wire nuts, attach the hot, neutral, and interconnect wires.
| Black wire (hot) | Attach to black wire on power connector |
| White wire (neutral) | Attach to white wire on power connector |
| Orange wire (interconnect) | Standalone (single-station) alarm: This wire is not needed; tuck the orange wire into the junction box.Interconnected alarms:Strip 1/2 inch from the orange wire on the connectorUse a wire nut to attach the orange wire on the connector to the orange wire in the junction box. |
Step 2: Mount the alarm
Next, you’ll mount the alarm.
1. Thread the wires through the mounting bracket.
2. Secure the mounting bracket to the ceiling or wall using screws (included in packaging).
3. Insert the power connector into the plug on the back of your alarm.
4. Tuck any hanging wires into the junction box.
5. Position the base of the alarm onto the bracket and turn it clockwise until it’s secured.
6. Remove the pull-tab to activate the backup battery.
| Optional security step: If needed, you can lock the alarm in place or lock the battery door to prevent tampering. |
Step 3: Install and interconnect more alarms
If you are installing more alarms, repeat the process throughout the building. Interconnected units must meet all requirements:
- The same fuse or circuit breaker must power all interconnected units.
- Up to 18 compatible units can interconnect, with a limit of 12 smoke alarms.
- The total length of wire interconnecting the units should be less than 1000 feet. Use sheathed electrical cable with 3 wires (hot, neutral, and interconnect). This type of cable is commonly available at hardware and electrical supply stores.
- All wiring must conform to all local electrical codes and NFPA 70 (NEC). Refer to NFPA 72, NFPA 101, and your local building code for more information.
- Interconnect wiring diagram:
If you are in doubt about any of these interconnect requirements, contact an experienced electrician to install your wiring and alarms.
Step 4: Restore power and test the alarm
After installation is complete, you’ll restore power to the junction box. Under regular operation, the power indicator light on the alarm shines/blinks to show that it is receiving AC power.
Here’s how to test standalone or interconnected alarms.
- Standalone Alarms: Press and hold the Test/Silence button until the unit alarms.
- Interconnected Alarms: Press and hold the Test/Silence button until the first unit alarms. All interconnected alarms should sound. Repeat this process to test each alarm in the interconnected series.
How frequent should I Change the Batteries?
The National Fire Protection Association (NFPA) recommends changing the batteries in your smoke alarm every 6 months. At First Alert, we offer 10-year smoke alarms that have a built-in 10-year battery, which eliminates the need for battery replacements for the life of the alarms. We also offer hardwired alarms with a battery backup, for protection during power outages.
You’ll likely notice a high-pitched chirping noise coming from your smoke alarm when it is time for the batteries to be changed. It is best to be proactive and change the batteries in your smoke detectors before that noise occurs. When you change the batteries in one alarm, make sure you change the batteries in the rest of the alarms in your home as well.
How can I stop false Smoke Alarms?
If your smoke alarm is sounding and you’ve confirmed there isn’t an emergency, you may be dealing with a false or “nuisance” alarm. Fortunately, most nuisance alarms can be stopped and prevented.
Step 1: Silence your alarm
To silence a nuisance alarm, press and hold the Test/Silence button on your unit. This will quiet the horn so you can find what caused the alarm. If you’re not able to find the button, read our guide for more help: Use the Silence Button on Smoke or CO Alarms.
Step 2: Review these fixes
The steps to fix the nuisance alarm will vary depending on the cause of the alarm, whether its dust in the sensing chamber or a nuisance alarm caused by shower steam.
Take a moment to review these questions to help uncover the cause of the false alarm and correct possible underlying issues.
• When was the unit installed?
Check the manufacture date on the back of your unit. Alarms expire over time. If your alarm is older than 7-10 years, it’s time to remove the old alarm and replace it with a new one.
• Is the unit installed near a source of steam, moving air, direct sunlight, HVAC vents, or fluorescent lighting?
Certain alarm locations in the home are more likely to cause nuisance alarms. Follow our smoke alarm placement guidelines to ensure your alarm is installed far enough away from kitchens, bathrooms, furnaces, or fireplaces.
• Has the unit been cleaned recently?
Check for bugs, debris, or dust in the sensing chamber. The inside of the alarm might have been triggered by hidden dust, dirt, or spiderwebs. Regular cleaning prevents most nuisance alarms. Clean the detector with a can of compressed air and your vacuum’s soft brush attachment and reinstall the alarm.
• Have you experienced power issues or outages recently?
Hardwired alarms may briefly sound when power is interrupted, then restored. Power interruptions are common in areas where utility companies switch grids in the early hours of the morning. In AC or AC/DC smoke alarms, a loose hot wire connection can also disconnect power to the smoke alarm. The effect is the same as a power failure. When power is restored, the units may alarm briefly. If any of this might be the case in your home, we recommend reaching out to an electrician.
• Is there an alarm malfunction?
If you eliminated all the possible causes above and your unit is still nuisance alarming, please reach out to one of our consumer support representatives to assist.
• If battery-operated, is the alarm installed over a junction box?
Battery-operated alarms are not designed for junction box installation. Installing battery-operated detectors over electrical junction boxes may cause false alarms. Try relocating the alarm.
Editor’s recommendations
- First Alert Z-Wave smoke and carbon monoxide alarm 3-pack review
- Kidde Nighthawk Carbon Monoxide detector reviews – how to install?
- Nest Protect – Smoke Alarm – Smoke Detector and Carbon Monoxide Detector review
- First Alert BRK SC9120B hardwired smoke and carbon monoxide (CO) detector review
- Kidde smoke & carbon monoxide detector battery powered review & price